Setting your RPL Withdrawal Address
It's important to understand the difference between your primary withdrawal address and your RPL withdrawal address. By default, your RPL withdrawal address is unset and your Primary withdrawal address is where all of your RPL checkpoint rewards, your staked RPL, and Beacon Chain ETH will be sent to.
You can set a separate withdrawal address for your RPL if you wish. Your RPL withdrawal address if set will be able to trigger and claim RPL from inflation rewards and will have no effect on ETH consensus rewards or anything related to ETH. In this case, your Primary withdrawal address will no longer have any authority over RPL related actions.
This creates some interesting opportunities where RPL can be supplied by an entity to a node operator that does not wish to have exposure to RPL. That entity can then claim RPL rewards for putting up the required insurance collateral for the node. In other words, this allows different actors to supply each collateral type.
Upon setting up your node for the first time, your RPL withdrawal address defaults to being unset. If you choose to set an RPL withdrawal address, it is vitally important to set this to a different address controlled by a cold wallet. A cold wallet could be a hardware wallet (such as a Ledger, Trezor, or Grid+), or a Smart Contract wallet (such as Safe).
We strongly recommend that you DO NOT use a hot wallet such as MetaMask as your RPL withdrawal address.
This way, if your node wallet is compromised, the attacker doesn't get access to your staked RPL by forcing you to exit because all of those funds will be sent to your separate cold wallet (which they hopefully do not have).
RPL withdrawal addresses are set at a node operator level. If you create multiple minipools, they will all refer to the same RPL withdrawal address so you only need to perform this setup once.
See here for some basics on wallet security from the Ethereum Foundation.
There are two different ways to do this. Please read both options below to determine which one applies to you.
Use this method if your new RPL withdrawal address can be used to sign transactions via MetaMask or WalletConnect.*
NOTE
This method will require you to submit a transaction from your new RPL withdrawal address, so you must have a small amount of ETH in that address already.NOTE
For users of Ledger hardware wallets, note that Ledger Live does not yet support MetaMask or WalletConnect natively. You will need to use MetaMask and connect it to your Ledger instead. Follow the official Ledger instructions to do this.To work with the Rocket Pool website, you will need to have your Ledger connected, unlocked, and the ETH app open. You will also need to enable "blind signing" for the current session; you can find this within the Settings portion of the ETH app on the device. Bind signing will automatically be disabled after you close the session.
If you are using Hoodi Testnet and want to use your Ledger as your RPL withdrawal address, you must create a new Ethereum wallet on your Ledger first to ensure you don't connect your live address to the test network, which tends to cause confusion. Make sure to select the Hoodi Testnet in the network selection dropdown when connecting your Ledger to MetaMask. Note that Ledger Live will not show your balance on the test network, but other applications which support the test network (such as MetaMask and Etherscan) will be able to display it.
- Run
rocketpool node set-rpl-withdrawal-address 'your cold wallet address or ENS name'. Your new RPL withdrawal address will be marked as "pending". Until you confirm it, your old RPL withdrawal address will still be used. - To confirm it, you must send a special transaction from your new RPL withdrawal address to the minipool contract to verify that you own the RPL withdrawal address.
- The easiest way to do this is to navigate to the Rocket Pool RPL withdrawal address site (for the Hoodi Testnet or for Mainnet).
- If you haven't already connected Metamask or WalletConnect to the Rocket Pool website, do this now. Click the select wallet button in the center of the screen, and choose MetaMask or WalletConnect based on which wallet you would like to use. You will then be prompted asking you to confirm the connection. For example, using MetaMask:
Click Next, then click Confirm to enable the Rocket Pool website to use your wallet. 3. Select RPL Withdrawal Address from the top menu (or the hamburger menu on the left side if you're on a mobile device). 4. You will see this prompt:
- Type your node wallet address here and click on the orange Find button to continue.

- You will be prompted to confirm a pending RPL withdrawal address. This should be the same address you used while running this command previously:
rocketpool node set-rpl-withdrawal-addressSelect Confirm Pending when you're ready. - Now, there should be a new confirmation dialog in your wallet. Again, using MetaMask as an example, click the MetaMask icon to open it and you should see something like this:
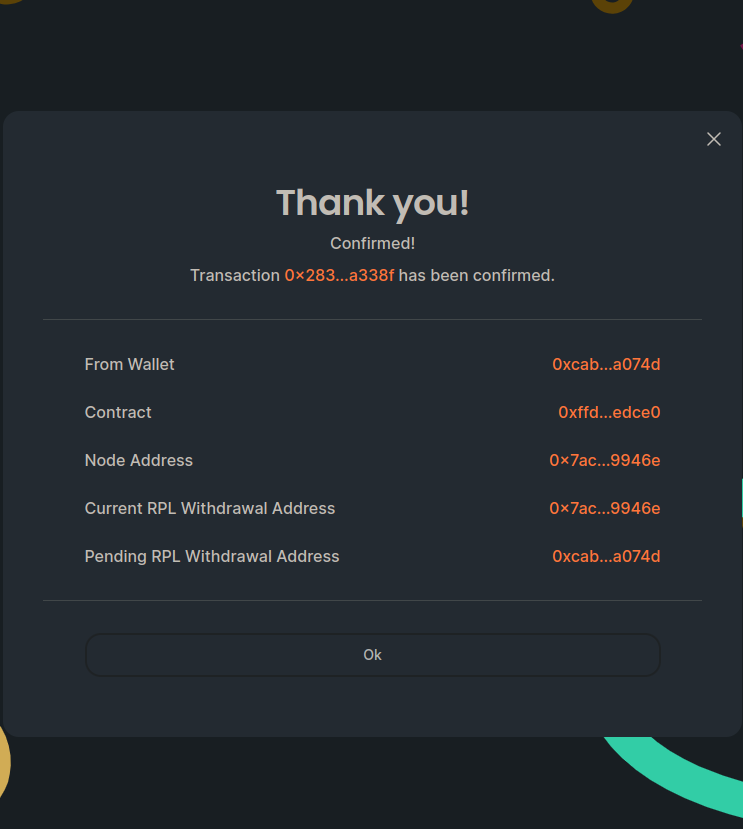
Click Confirm to send the transaction to the network. This will take some time until it gets included in a block, but once it does, you will see a confirmation dialog:
- Your new RPL withdrawal address will now be confirmed and activated. You can view this with
rocketpool node status.
Once this is done, you will no longer be able to change your RPL withdrawal address using the set-rpl-withdrawal-address command.
To change it, you will need to send a signed transaction from your active RPL withdrawal address (the one you just switched to).
The Rocket Pool website has a function to help you do this.
If you'd like to unset your RPL withdrawal address, the process is pretty simple. First thing, you'll want to navigate back to the RPL Withdrawl Address page on the Rocket Pool website.
If you're signed in with the node's RPL withdrawal address, you should be able to click the unset button on the right here:
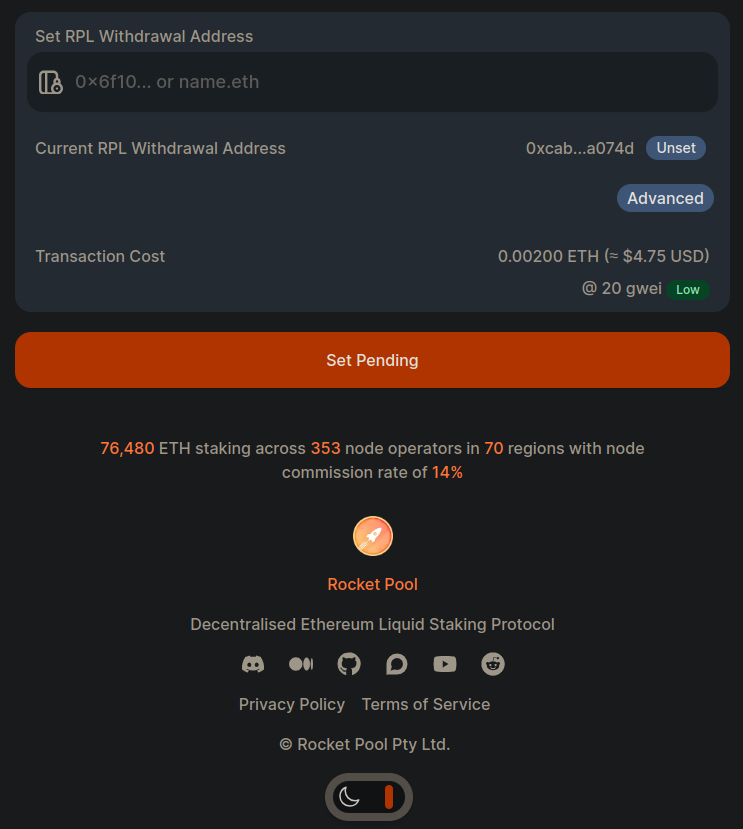
Clicking unset will take you to a page where you can confirm the details. If you're happy with what you see, click the orange unset button to send the transaction to the network.
That's all there is to setting your RPL withdrawal address! We hope you found the process quick and easy.
Feel free to swing by our Discord server to let us know what you thought of it and keep tabs on the project as it evolves.