Expiring Pre-Merge History
All Execution clients now support partial history expiry in accordance to EIP-4444. Users can substantially
reduce the storage requirements for their node by removing pre-merge block history starting in Smartnode version v1.17.0. Feel free to check out
this blog post to learn more about partial history expiry: https://blog.ethereum.org/2025/07/08/partial-history-exp
Please keep in mind that the steps to remove pre-merge history depend on your node's selected Execution client:
- Nethermind users will need a full resync to remove pre-merge history.
- Geth users can use the
rocketpool service prune-eth1command or conduct a full resync. - Besu and Reth users can perform an online prune while their node continues to attest.
The following steps to remove pre-merge history are for Docker mode nodes only. If you are using an external client in Hybrid mode or Native mode, please refer to the documentation provided by your Execution client.
Start by opening the Settings Manager:
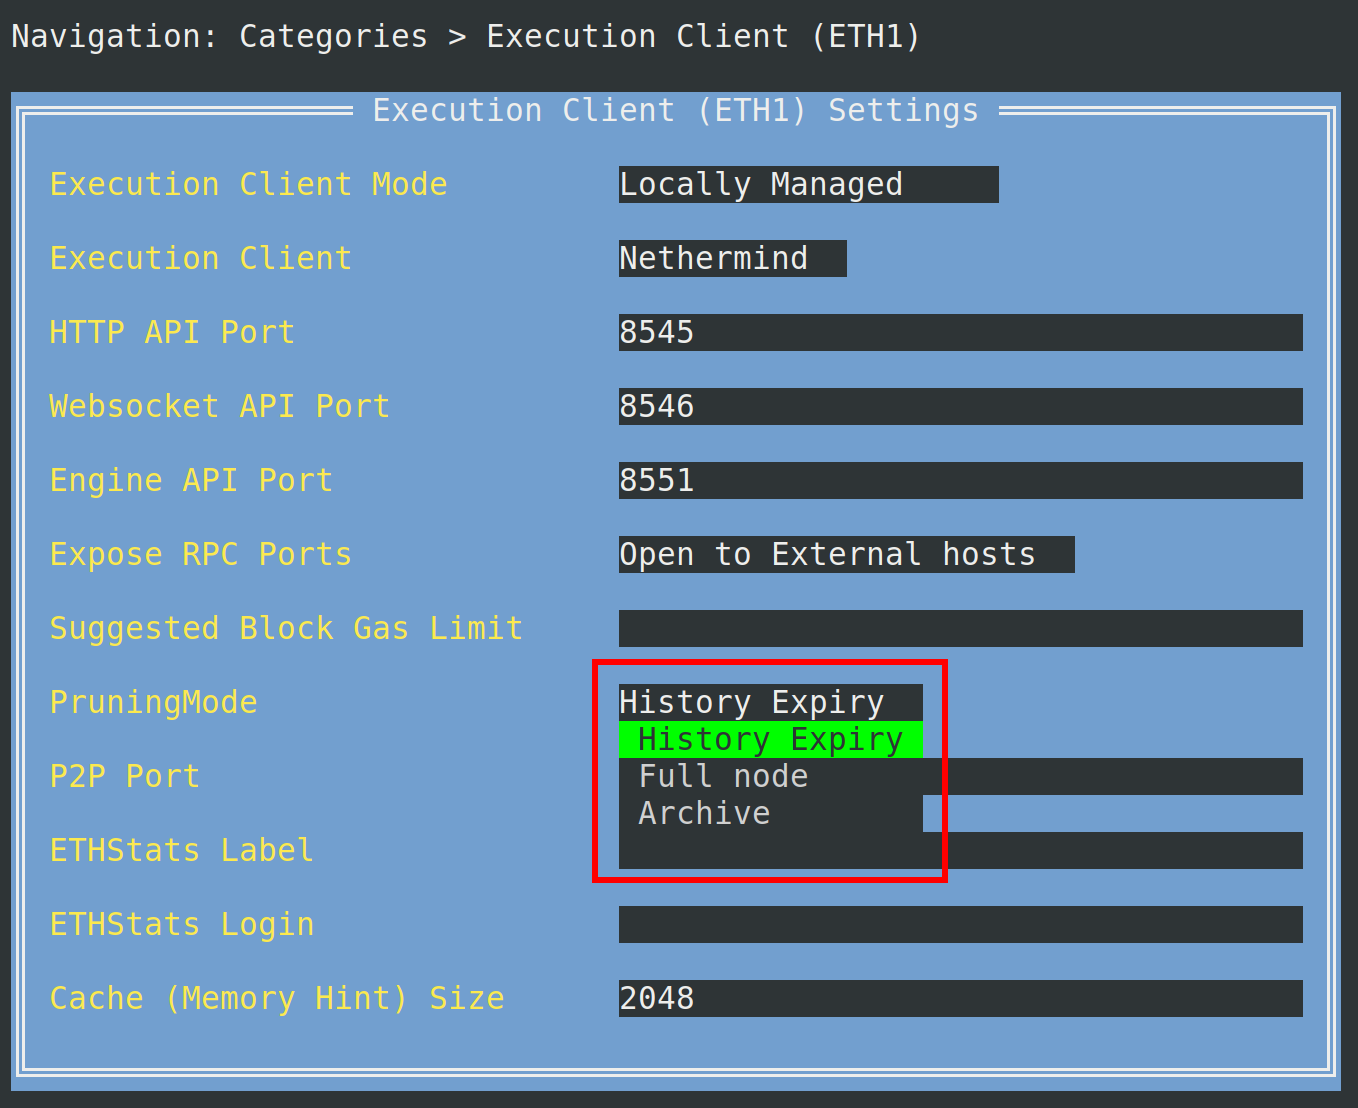
To change the Execution Client pruning mode, go to the Execution Client (ETH1) menu and select the History Expiry setting in the dropdown menu for Pruning Mode
After you've made the selection, press escape to return to the main menu, then press tab to highlight the Review Changes and Save button. Press
the enter key to continue. You'll be presented with a menu to preview the changes to your Execution client settings.

Press the enter key on Save Settings to save and exit the Settings Manager, then enter y to restart your rocketpool_eth1 container.
From this point on, the steps differ depending on which Execution client you're using:
Nethermind nodes require a full resync to remove pre-merge history. You must resync your Execution client after saving
the History Expiry setting and restarting your eth1 container.
If you don't have a fallback node configured, your node will stop validating during a resync. A fallback node will allow your primary node to continue attesting and proposing blocks during a prune or resync. Click here to learn how to configure a fallback node.
Use the following command to resync your Execution client:
You're all set! The node will no longer store pre-merge data, substantially improving the feasibility of fitting a node on a 2 TB drive. We recommend monitoring the progress using the following command.