Specifying a Fallback Node
Starting with 1.5.0 of the Smartnode stack, you can provide a "fallback" Execution client and Consensus client pair that can take over for your primary clients if they ever go offline (such as because you use Geth and need to prune it). In this situation, your primary node machine will still be responsible for attesting and proposing blocks with your minipools' validator keys, but it will connect to an external machine to interact with the Execution layer and Beacon chains.
Essentially, it allows you to temporarily use another pair of clients for things like querying the chains, sending transactions, and receiving blocks to attest to. This pair can be externally managed (like Hybrid mode), or it can be another Rocket Pool node (another Docker mode machine that has the API ports exposed, which we'll cover below).
Once your node's primary clients are back online, the Smartnode and your Validator client will switch back to them automatically.
A fallback node is not the same as a "backup" node. Fallback nodes have an Execution and Consensus client pair synced to the chain and running, but they do not have your node's wallet or its validator keys loaded.
If your main node ever goes offline, your fallback will not start validating for you.Supported Clients
As of v1.9.0, all our supported validator clients have added Fallback support with only a few limitations:
| Name | Supports Fallback | Valid Fallback Clients |
|---|---|---|
| Lighthouse | Yes | Any (doppelganger protection off) Lighthouse (doppelganger protection on) |
| Nimbus | Yes | Any |
| Prysm | Yes | Prysm |
| Teku | Yes | Any |
| Lodestar | Yes | Any |
Setting up a New Node (Docker Mode)
You can use a 2nd machine that you own locally, a remote node hosted on a VPS, or a cloud-based node as a fallback node.
This example shows you how to create a 2nd Smartnode on a different machine using Docker mode, which can serve as a fallback node.
If you already have a 2nd node ready and have its RPC ports exposed, feel free to skip this section.
-
Follow the steps in the guide on setting up a node (local or remote).
-
Once the machine is ready, install the Smartnode stack.
-
Run
rocketpool service configto specify which clients you'd like to use.- When you get to the end of the wizard and it asks if you'd like to review your settings, select Yes.
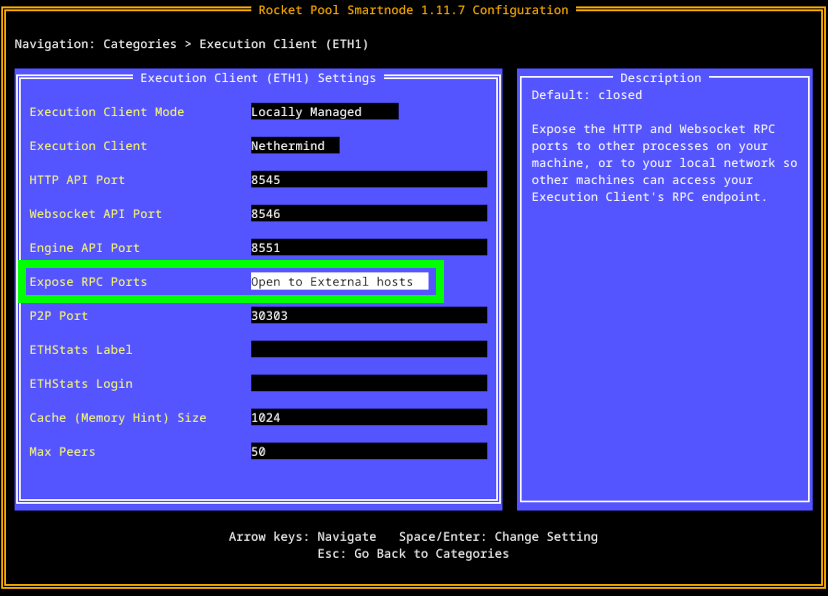
- Enter the
Execution Clientsettings. - Check the
Expose RPC Portsbox:
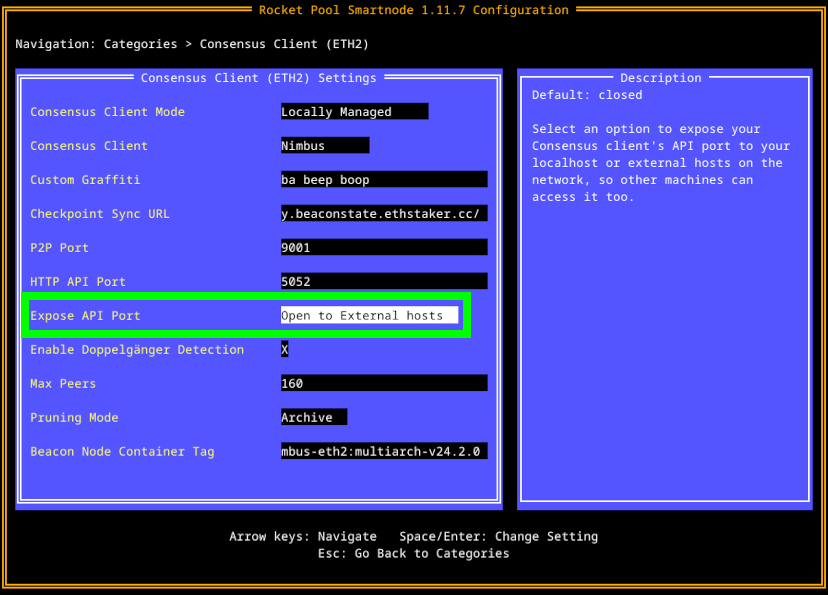
- Go back and enter the
Consensus Clientsettings. - Check the
Expose API Portbox (and, if you're using Prysm, theExpose RPC Portbox as well):
- Save the settings and start the Smartnode.
-
Skip to the Securing your Node guide to set up SSH and the proper security posture on it.
- If you have
ufwinstalled, you will need to add rules to allow incoming traffic to the API ports (8545,8546, and5052by default; also5053if you're using Prysm).
- If you have
-
That's it! You can stop here.
Do not create a wallet with rocketpool wallet init or recover your old wallet.
Leave this node without a wallet and without validator keys.
Its only job is to have a synced Execution client and Consensus client.
Connecting your Main Node to the Fallback Node
Once you have a fallback node prepared, you can connect it to your main node.
- Enter the
rocketpool service configTUI and enter theFallback Clientssettings. - Check the
Use Fallback Clientsbox. - Enter the RPC URL for your Execution client in the
Execution Client URLbox. For example, if your fallback node's IP address is192.168.1.45and you have its Execution client on the default port of8545, you would enterhttp://192.168.1.45:8545here. - Do the same for the RPC URL of your fallback Consensus client. Following the same example, if you have it on the default port of
5052, you would enterhttp://192.168.1.45:5052here.
The final page should look like this:
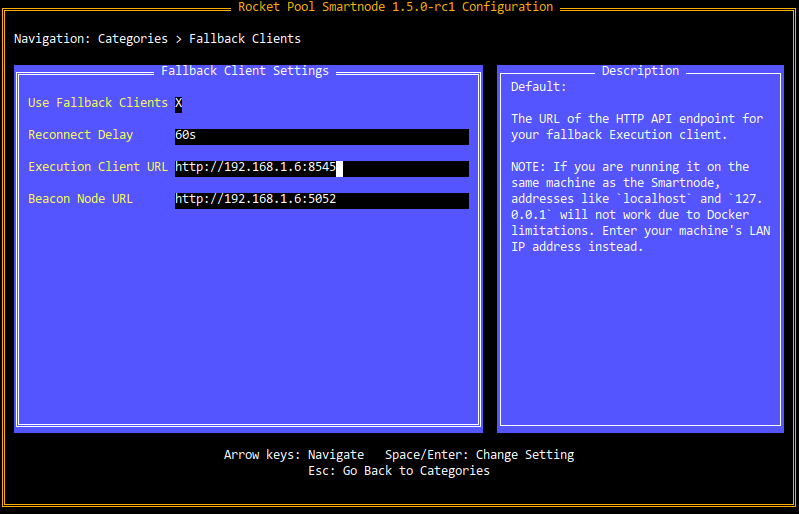
Native mode users can follow the same steps, though the TUI will look slightly different from the above screenshot.
Note that this will only provide the Smartnode itself (the daemon service) with fallback support; you will have to update your Validator client service's arguments manually to give it access to the fallback clients.Press enter on the final box to ensure that it's confirmed, then save the settings and apply the changes.
Once they've been applied, you can confirm the availability of your fallback node using the rocketpool node sync command:
If it shows that both the fallback Execution and Consensus client are synced, then you're all set!
Testing the Fallback Clients
If you'd like to be absolutely sure that your configuration is going to work by testing the fallback clients, simply stop the Execution and Consensus clients on your main node:
Then run any command that queries the chain, such as rocketpool network stats.
You will see a warning message at the top indicating that one (or both) of your primary clients are offline, and that it's reverting to the fallback clients:
Finally, start your primary clients again:
And you're done! Your fallback setup is working.
Next Steps
Whether or not you've opted into creating and/or running a fallback node for your setup, the next step is to learn about priority fees. Click on the next section of the guide when you're ready to proceed.