Intro to Secure Shell (SSH)
In general, there are two ways to access your node machine: locally, and remotely.
- Locally refers to sitting down at the physical node and using a monitor and keyboard connected directly to it.
- Remotely refers to connecting to the node using a different computer (say, a laptop or desktop) over a network and interacting with it from there.
Most of the time, node operators prefer the flexibility of working on their node remotely.
The Smartnode currently doesn't have a GUI (Graphical User Interface), only a CLI (Command Line Interface), which means interacting with it is done entirely by typing commands into a command-line terminal. As such, interacting with it remotely requires some way to access your node's terminal from a different machine. In this section, we'll provide a brief introduction to the most popular way of doing this: SSH.
There are a few different ways to use SSH from a Windows machine.
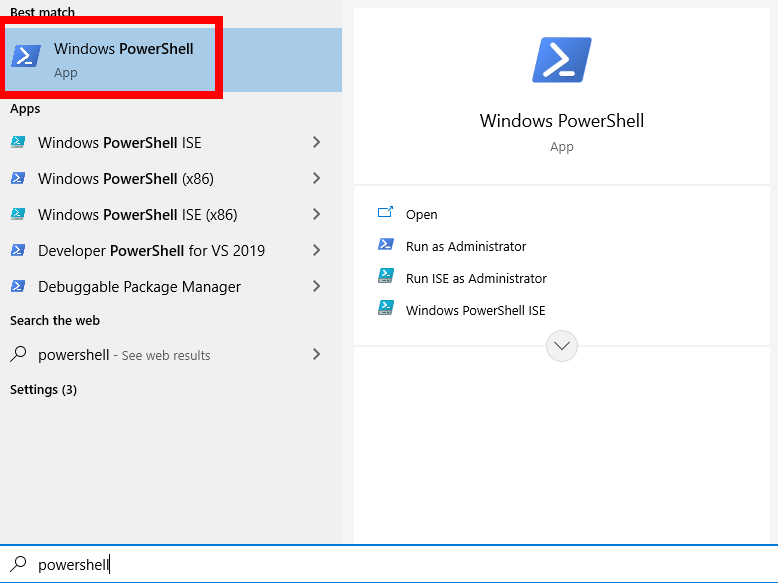
The simplest is to use Powershell, which is a powerful command terminal that comes built into modern versions of Windows. Powershell has SSH included, so you can use it right away without installing any supplemental programs.
You can find it by opening the Start menu and typing Powershell into the search bar; there will be several
options, but option you want is simply called Windows Powershell:
This will open up a terminal with a blue background.
You can use ssh from here - see below for instructions on how to do that.
Another popular tool is called PuTTY. PuTTY is a special program that includes a terminal dedicated for SSH usage, but it also comes with a convenient GUI for doing things like changing configurations, saving settings to a "profile", and keeping a list of machines you can easily connect to by selecting from a list.
Instead of using ssh as you would with the other tools, PuTTY will do this for you automatically - all you need to
provide are the username and password.
For information on how to use PuTTY, take a look at this great
tutorial.
NOTE: PuTTY might display the wrong colors in the rocketpool service config text-based user interface (TUI).
There's an easy solution for this. In the PuTTY
settings, navigate to Connection > Data > Terminal Details
in the dropdown menu. There should be a Terminal-type string text box. Type in xterm-256color, then save
the settings
to resolve this.
Here's how you would connect to your node using SSH.
Run the following command from your laptop or desktop, not from your node itself!
Say, for example, that your node's username is staker and your node's IP address is 192.168.1.10.
You would connect to it with the following command:
The first time you do this, you will see a message presenting the public key that your node is using - if you are
familiar with how to verify this key, you can do so now.
Otherwise, if you trust that you have the correct node IP address in your ssh command, you can just say yes to
accept it.
You only need to do this once.
The client will then prompt you for your user's password; once you enter that, you're in! You will be greeted with a welcome message, some details about your machine, and a new prompt.
At this point, everything you type in the terminal is executed remotely on your node machine - it's as if you were logged directly into the node machine and typing on it with a locally-attached keyboard!
You'll need to SSH into the terminal periodically for updates and maintenance. It can be inconvenient to remember how to log in to your node, so it may be helpful to shorten this command by creating a memorable alias - a custom "shortcut" command.
If you do this, be sure to create the alias on the client machine, not on the node!
If your terminal is still connected to the node, first run exit at the command prompt (or simply open a new
terminal window).
This section only applies to Linux/OSX or WSL users - PowerShell is not supported.
In this example, we'll create an alias called ethnode which will replace the SSH command.
Assuming, as before, that your node's username is staker and your node's IP address is 192.168.1.10, create the
alias with the following command:
Reload the alias list to make your current terminal window aware of the new alias:
Now, you can connect to the node using the alias you just created instead of the longer command that involves specifying the node's IP address: