Staking Overview
This guide will introduce you to how staking with Rocket Pool works (how your ETH is put to work and your rewards are generated) and summarize the ways in which you can stake.
If you're not interested in how staking works and just want to learn how to stake, click here to skip to that section.
How Ethereum Staking Works
Before getting into Rocket Pool, let's talk about staking on Ethereum in general. Since the Merge on September 15th, 2022, Ethereum now comprises two blockchains in parallel: the Execution layer (formerly ETH1), which contains all of Ethereum's transaction data, and the Consensus layer (also known as the Beacon Chain, formerly ETH2) which consists of a network of validators that collectively determine the validity of each transaction and each block broadcast to the network.
Staking is the process of creating and maintaining one (or more) of these validators on the Beacon Chain to help the network maintain the consistency and security of the Ethereum blockchain. Validators do this by listening for transactions and new block proposals, and attesting that the proposed block contains legal, valid transactions by doing some number crunching and verification behind the scenes. Occasionally, they get to propose new blocks themselves.
To ensure that the network is resilient against malicious validators that lie about the current state of the chain, each validator is required to lock exactly 32 ETH up as a "stake" in the networks. Performing their duties correctly and agreeing with the majority of the other validators will earn them rewards; performing incorrectly and attacking the chain will cost them some of their locked 32 ETH balance. The amount taken depends on the severity of the attack and the number of validators that participated in it.
Validators in Ethereum are assigned attestations and block proposals on a schedule. This is very different from the old Proof of Work (PoW) system, where everyone is constantly trying to race each other and come up with the next block before everyone else. This means that unlike PoW where a miner isn't guaranteed to earn a block reward unless they find the next block, Proof of Stake validators are guaranteed to have slow, steady income as long as they perform their duties.
Initially, validator rewards simply accrued on the Beacon Chain against each validator and were inaccessible by their operator. As of the "Shapella" hard fork, validator rewards are routinely "skimmed" to the Execution Layer address defined by the validator's withdrawal credentials.
Additionally, now that the Execution and Consensus layers have merged, validators are also awarded with priority fees for transactions included in blocks they propose. These priority fees are paid directly on the Execution layer according the "Fee Recipient" set by the block proposer. If the validator is participating in a MEV network to propose a block built by someone else, that builder will provide a supplemental tip to the validator known as a MEV reward. This is also available directly on the Execution layer and is provided at the same time as priority fees.
How Rocket Pool Works
Unlike solo stakers, who are required to put 32 ETH up for deposit to create a new validator, Rocket Pool nodes only need to deposit either 8 ETH or 16 ETH per validator. This will be coupled with 24 ETH or 16 ETH respectively from the staking pool (which stakers deposited in exchange for rETH) to create a new Ethereum validator. This new validator is called a minipool.
To the Beacon chain, a minipool looks exactly the same as a normal validator. It has the same responsibilities, same rules it must follow, same rewards, and so on. The only difference is in how the minipool was created and how withdrawals work when the node operator decides to voluntarily exit the minipool or gets slashed. All of the creation, withdrawing, and rewards delegation is handled by Rocket Pool's smart contracts on the Execution layer. This makes it completely decentralized.
The rETH Token
As a Rocket Pool staker, your role is to deposit ETH into the deposit pool which will enable a node operator to create a new Beacon Chain validator. You can stake as little as 0.01 ETH.
In doing so, you will be given a token called rETH. rETH represents both how much ETH you deposited, and when you deposited it. The ratio includes rewards that Rocket Pool node operators earn from:
- The Beacon Chain itself
- Priority fees from block proposals
- MEV rewards from block proposals
More specifically, the value of rETH is determined by the following ratio:
Since the Beacon Chain rewards, priority fees, and MEV rewards will constantly accumulate, this means that rETH's value effectively always increases relative to ETH. The rETH/ETH exchange rate is updated approximately every 24 hours based on the Beacon Chain rewards earned by Rocket Pool node operators.
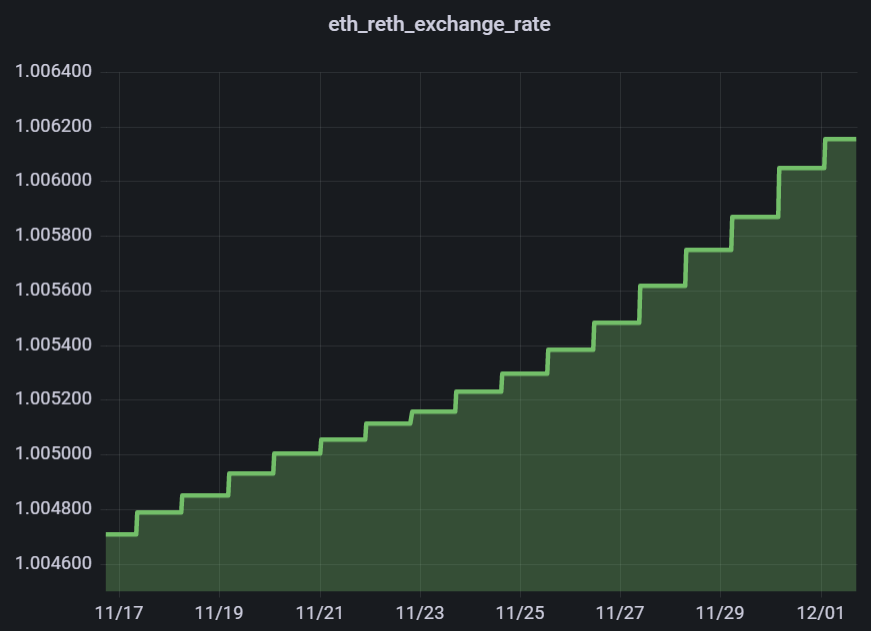
To illustrate this point, here is a chart of rETH's value (relative to ETH) over time - as expected, it demonstrates slow but steady growth:
Let's do a simple example as a demonstration.
Say you stake at the very beginning when 1 ETH = 1 rETH. You deposit 10 ETH and receive 10 rETH back.
After a few years, the balances on the Beacon Chain grow due to validator rewards. Say 128 ETH had been staked with Rocket Pool and the sum of all validator balances on the Beacon Chain was 160 ETH. Then 1 ETH would be worth (128/160) = 0.8 rETH; conversely, 1 rETH would be worth (160/128) = 1.25 ETH.
At this point, you could trade your 10 rETH back to Rocket Pool's smart contracts and receive 12.5 ETH in return.
This means as long as you are holding rETH, you are staking with Rocket Pool! You do not need to get it from Rocket Pool directly. For example, you can purchase rETH on an exchange; as every rETH token is exactly the same, you will automatically receive the benefits of staking just by holding the token!
Trading rETH back for ETH directly with Rocket Pool is only possible when the staking pool has enough ETH in it to handle your trade. ETH in this pool comes from two sources:
- ETH that other stakers have deposited, which hasn't been used by a node operator to create a new validator yet
- ETH that was returned by a node operator after they exited one of their validators and received their rewards from the Beacon Chain
It's possible that if node operators have put all of the staking pool to work on the Beacon chain, then the liquidity pool won't have enough balance to cover your unstaking. In this scenario, you may find other ways to trade your rETH back to ETH (such as a decentralized exchange like Uniswap) - though they will likely come with a small premium.
As an alternative to holding onto and eventually returning your rETH to the Rocket Pool, you are also free to use it in DeFi applications. You can trade it, lend it, use it as collateral... as rETH is a standard ERC20 token, you can use it in any way you could use any other token.
Tax Implications
Each country has its own tax laws, and it would be impossible to document them all here.
In some countries, depositing ETH for rETH may be considered a taxable event.
However, because rETH inherently accumulates value while the actual amount of the token you hold remains constant, simply holding it usually does not generate any taxable events.
This may make rETH a preferable staking token for long-term holding if your country separates short-term and long-term capital gains taxes.
Tax laws related to cryptocurrencies are in their infancy; each user should do their own research and consider speaking with a tax professional.
Below are some helpful sites that offer tax assistance to users related to Ethereum. This is not an official endorsement - users are advised to do their own research regarding tax implications and strategies:
How to Stake with Rocket Pool
As described above, as long as you are holding the rETH token, you are a Rocket Pool Staker. We will summarize several common ways to acquire it here.
All of the methods described here rely on the usage of an Ethereum wallet such as MetaMask. If you have never used an Ethereum wallet before, we strongly encourage you to learn more about them and practice using them before staking with Rocket Pool. The sections below include some steps that are demonstrated with MetaMask as an example; they should translate to your wallet of choice easily enough for you to follow along.
Via Rocket Pool Directly
With this method, you will use a web3 wallet (such as MetaMask) and interact with Rocket Pool's website to swap ETH for rETH and vice-versa. This method is guaranteed to provide you with the exact amount of rETH that your ETH is worth, since it's coming directly from Rocket Pool's smart contracts, but it can be somewhat expensive if the network's gas prices are high and you're staking a relatively small amount of ETH.
If you are practicing staking on the Hoodi Testnet, the direct method above is the only option currently supported.
Click here to learn how to stake via Rocket Pool directly.
Via a Decentralized Exchange on Ethereum (Layer 1)
With this method, you will access a decentralized exchange such as Balancer or Uniswap and purchase rETH using your token of choice, just like you would do any other token swap.
Rocket Pool has officially created a Balancer composable stable pool. Composable stable pools are ideal for tokens like rETH, because they honor the true exchange rate reported by the Oracle DAO - this means exchanging with it will have much lower slippage and lower fees than a conventional decentralized exchange, so you get a much better deal when buying or selling rETH.
Because of this, and because it has a smaller transaction fee than swapping directly via Rocket Pool's website, we strongly recommended using Balancer if you want to stake via this route.
If Balancer doesn't work for you, there is also an ETH-rETH liquidity pool on Uniswap. Note that this is a conventional pool, so you will be affected by slippage and higher fees if you use it, but the gas fee will still be lower than staking directly via Rocket Pool's website.
Click here to learn how to swap ETH for rETH via a decentralized exchange on Layer 1.
Via a Decentralized Exchange on a Layer 2 Network
With this method, you will start by bridging your existing ETH (or other tokens of choice) onto an Ethereum Layer 2 network such as Optimism or Arbitrum and then use a decentralized exchange on the network to purchase rETH. If you already have tokens on a Layer 2 network, this method is compelling because the transaction fees are ~10x smaller than on the Ethereum mainnet. However, if you have not used a Layer 2 network before, it does require a few additional steps to get set up.
Click here to learn how to swap ETH for rETH via a decentralized exchange on a Layer 2 network.
Video Demonstration
Community member Kevster has put together a helpful video that demonstrates each of these options step-by-step:
For a more detailed writeup, select which method you would like to use from the links above and follow the guide for that section.